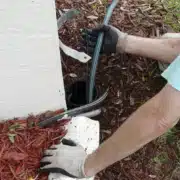
Ever glanced at your sewer bill and felt your eyebrows leap toward the heavens? You’re not alone. Many homeowners are finding their sewer costs mysteriously climbing, without an apparent change in household habits. It begs the question: why is this essential service taking such a hefty toll on our wallets? The sewer system is a part of our everyday life unless we have a septic. It is important to keep it functioning well as it carries wastewater to the treatment area. Let’s learn about when a sewer bill is high, what might be causing it, but also how to spot an issue before it’s too late.
Why Is It Important to Know About the Sewer?
Understanding the intricacies of sewer-related expenses can be a daunting task for many homeowners. However, with a clear understanding of the costs involved and knowledge of how to maintain your sewer system efficiently, you can navigate these expenses more effectively.
Average Sewer Bill Cost Per Month
The average sewer bill for homeowners typically falls within the range of $20 to $60 per month. This figure, however, is subject to significant variation based on factors such as location, usage, and the rate structure set by the local municipality. In Florida, the average monthly cost for sewer services can range between $20 and $80. This variation largely depends on the specific locality and individual usage levels.
Why Is My Sewer Bill So High?
A high sewer bill can be attributed to several factors. Increased water usage, leaks in the system, or even billing errors could be potential culprits. If you notice a sudden spike in your sewer bill, it’s crucial to investigate and identify the cause.
Signs of a Sewer in Trouble
Certain signs indicate that your sewer system might be in trouble:
Unusual Noises: Skeletons shouldn’t be the only things rattling in your home. Gurgling pipes could indicate a backup.
Foul Odors: A whiff of something foul could mean your sewer line is waving a red flag.
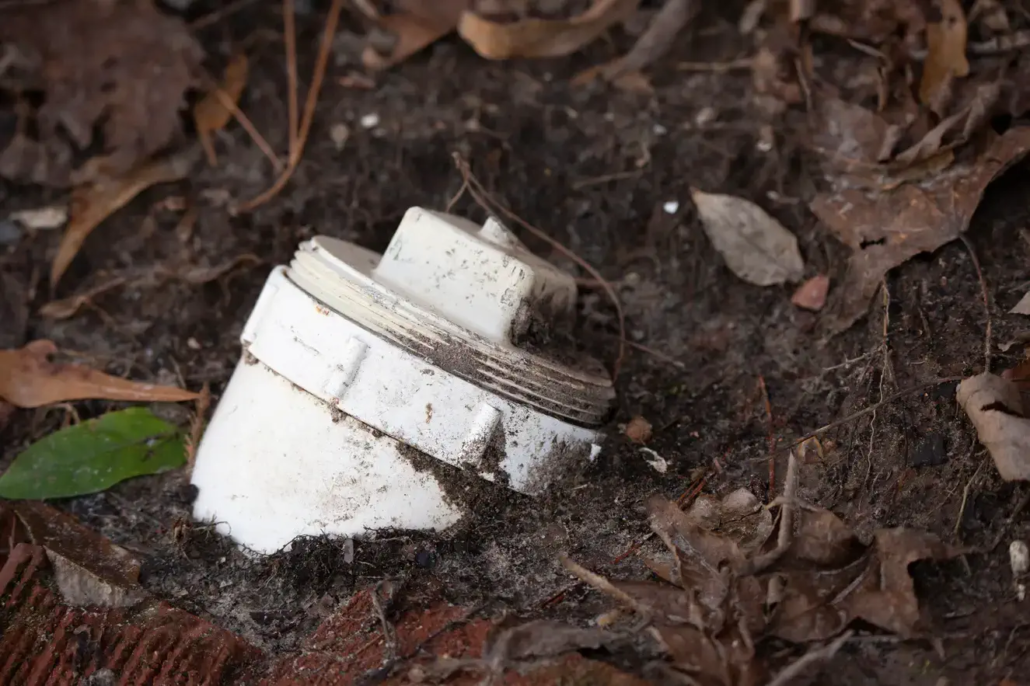
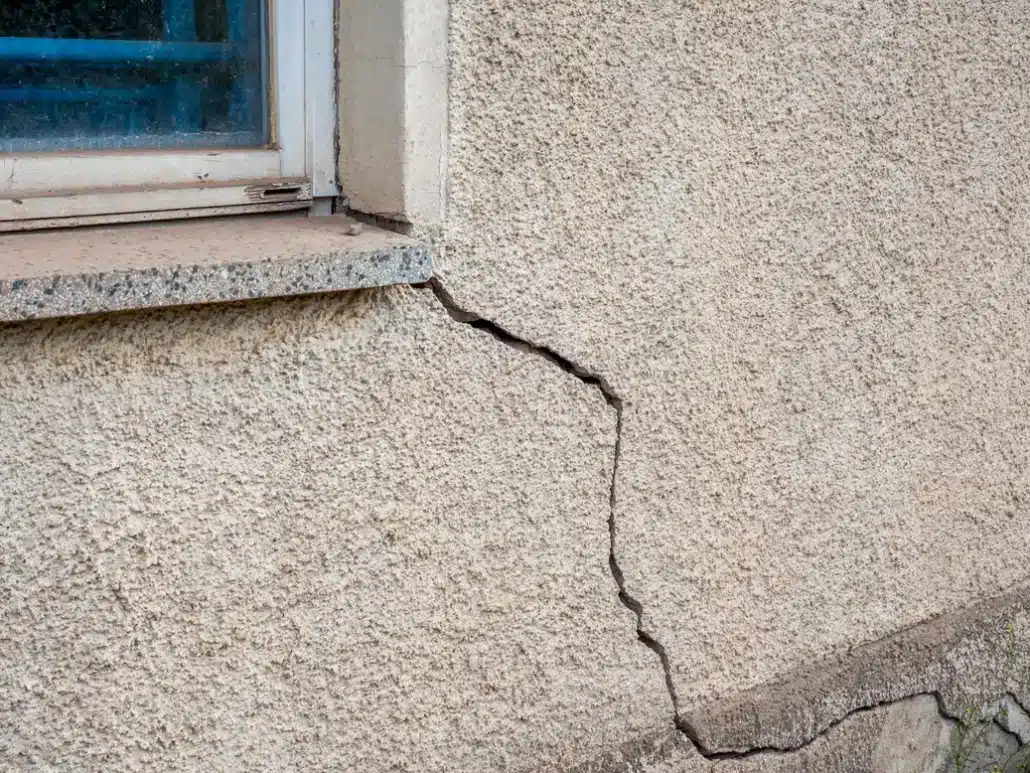
Water Woes: Puddles in your yard or slow drains inside your home? These are classic SOS signals from your sewer system.
What to Do When Your Sewer Bill is High?
If your sewer bill is higher than usual, start by reviewing your water usage. Look for any significant changes that could justify the increase. If your water usage hasn’t changed drastically, consider checking for leaks in the system or getting a professional inspection done.
Ways to Find Out What Is Causing Issues with Sewer
Identifying what’s causing issues with your sewer involves a few steps.
You can monitor your water meter for unusual activity which might indicate a leak.
Conducting dye tests in toilets can also help detect leaks.
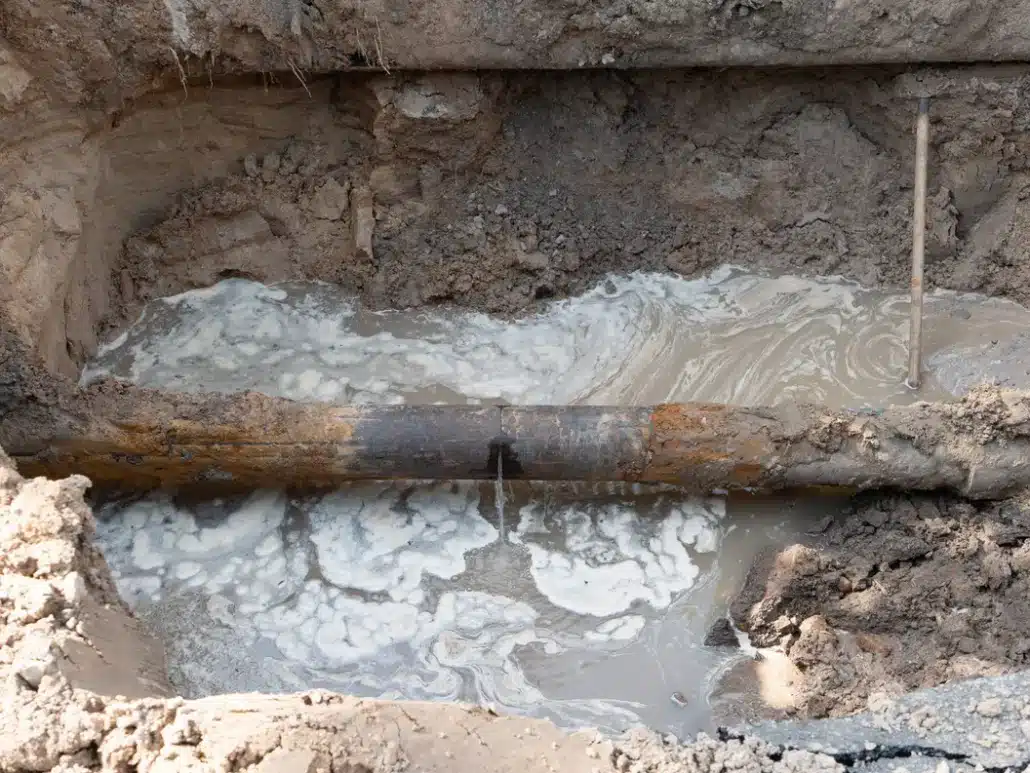
Inspecting pipes for corrosion or blockages can reveal issues, and video inspections can provide deeper insights into the state of your sewer system.
Average Sewer Repair Costs
Sewer repair costs can vary widely. Minor fixes might only cost a few hundred dollars, while major repairs or full replacements can run into the thousands. It’s important to get a professional estimate for any repair work.
Ways to Maintain The Sewer
Maintaining your sewer system involves being cautious about what goes down the drains, using strainers to catch debris, performing regular drain cleaning, and avoiding planting trees near sewer lines. Regular maintenance can prevent costly issues in the future. Ideas are:
Regular Check-Ups: An ounce of prevention is worth a pound of cure. Regular inspections can save you a ton of trouble.
Mindful Flushing: Your toilet isn’t a trash can. Flush wisely.
Plant Placement: Keep trees and larger plants away from sewer lines—their roots crave chaos.
Other Information To Know
Now that you know about high sewer bills, let’s take a look at other areas of maintenance.
One of those is knowing where the water meter is located. This is important as it controls the amount of water that flows into your home. Also, if you monitor it, you can find out the amount of water that is being used in the home and hopefully prevent future issues.
Another is when the city is responsible for sewer lines. The city is responsible for when they start at the main underground sewer pipe and are past your property boundaries. This is the main sewer line. On the other hand, the lower lateral and upper lateral sewer lines are the responsibility of the homeowner.
Lastly, it is important to know how deep the sewer lines are buried. Residential lines are usually buried 5-6 feet deep, while in colder areas it is 4-8 feet. On the other hand, city lines are buried 12 feet deep.
When Do I Call a Professional?
If basic troubleshooting doesn’t resolve the issue or if you notice signs of significant damage, it’s time to call a professional plumber or sewer service. They also have the expertise to diagnose and fix complex sewer problems. The sewer is nothing to mess with and you want to know if it is something you or the city are responsible for.
Check out the video below about a woman and her high sewer bill.
Conclusion
Being informed about your sewer system and taking proactive measures can help keep costs down and extend the life of your infrastructure. By monitoring your usage, performing regular maintenance, and acting swiftly when issues arise, you can effectively manage your sewer expenses. It’s important to keep up with the maintenance and also know what you or the city are responsible for. While taking a look at your sewer bill, this is a great time to call Honor Services as they are your best home inspection company in Brevard County, FL.
https://stg-insideandout-insideoutstg.kinsta.cloud/wp-content/uploads/2024/01/reisdential_sewer_line_23.webp563751BJ Johnsonhttps://d39oyu4lp7snwz.cloudfront.net/wp-content/uploads/sites/54/2019/08/31171419/io-favicon-300x300.pngBJ Johnson2024-01-19 14:10:382024-01-19 14:10:38Why Is My Sewer Bill So High?
When it comes to selling a home every homeowner wants to get the most money out of their investment. In some cases, there can be a huge upside when the windows are brand new. The words “brand new” give the buyer a sense of excitement about their new home purchase. Anytime that you can provide the potential buyer with the idea that one less project is needed makes the home buyer happy. Is it worth replacing windows before selling a house? Not necessarily. It is recommended that you update the weather stripping and caulking.
Let’s look below at when and why you should replace the windows in your home.
Assess the Condition and Value of Your Current Windows
When contemplating selling a house, assessing the condition of your windows and determining if it’s worth replacing them is a pivotal step. This analysis will not only inform potential buyers of the home’s state of repair but also contribute to the overall energy efficiency and aesthetic appeal that can sway purchasing decisions.
Conduct a Thorough Window Assessment
Begin with a meticulous examination of your windows. Here’s what to look for:
Signs of Wear: Check for drafts, condensation between panes, and difficulty in operation, which all suggest poor performance.
Structural Integrity: Inspect for decay in wooden window frames, cracks in the glass, or compromised seals. Any of these could impact both insulation and security.
Aesthetic Condition: Look for peeling paint, water stains, or outdated styles that detract from your home’s appeal.
Gauge Energy Efficiency
Energy efficiency is a key selling point in today’s market. Buyers are increasingly conscious of both their carbon footprint and the long-term cost savings associated with efficient homes. Energy Star-certified windows, for instance, can be a significant draw for buyers looking to reduce their energy bills.
Understand the Market
Real estate markets vary widely, and what’s expected in one neighborhood might be less important in another. In areas prone to extreme weather, for instance, the quality of windows can be a make-or-break feature for buyers. Research local trends and consult with real estate agents to understand how much value new windows might add to your home.
Cost-Benefit Analysis
Replacing windows can be a substantial investment. To decide whether it’s worth it, compare the costs of replacement to the potential increase in property value. Remember, while new windows may not cover their costs entirely at sale, they could expedite the selling process by making your home more attractive to buyers.
To Replace or Not to Replace
The decision to replace windows before putting your house on the market is not one-size-fits-all. Several factors must be weighed to determine whether this home improvement will translate into a worthwhile return on investment when you sell. Here’s how to clarify whether window replacement is the right move for your home sale.
Evaluate the Current State
Reflect on the thorough window assessment conducted earlier. If your windows show significant signs of wear, compromise the structural integrity of your home, or have a dated appearance that detracts from your home’s overall look, these issues might negatively impact a buyer’s perception of your property.
Consider the Energy Efficiency Factor
Energy efficiency upgrades can be a strong selling point. If your existing windows are not energy-efficient and you live in an area where energy conservation is a priority for buyers, investing in new windows could be a strong selling point that adds to your home’s market value.
Balance Costs and Returns
Weigh the costs of full replacement against potential returns. If the window issues are cosmetic, a less expensive repair might suffice. However, if the windows are functionally obsolete, this could be a deterrent for buyers looking for a move-in ready home.
Market Expectations
Understand what is standard in your area. If you’re in a high-end market where buyers expect homes to be turnkey, new windows could be necessary to compete. Conversely, if you’re in a seller’s market or an area where buyers are likely to renovate post-purchase, investing in new windows may not provide a significant return.
Buyer Incentives
Consider the alternative of offering an allowance for window upgrades in the sale price, which can be an attractive option for buyers. This allows them to choose their preferred style and may be a more cost-effective solution for the seller.
Consult with Professionals
Before making a decision, consult with a local real estate agent and a window installation professional. They can provide insights into the local market and the potential increase in sale price that new windows might bring.
Ultimately, while it is generally worth it, replacing windows before selling a house should be based on a combination of practical considerations and a strategic assessment of the housing market. If new windows will significantly enhance the curb appeal, functionality, and energy efficiency of your home, thus making it more attractive to buyers and likely to sell faster and at a higher price, then replacement is a sound investment. If not, then simple repairs and a good cleaning may suffice.
Cost Considerations for Window Repair or Replacement
When deciding whether to repair or replace windows before selling your home, it’s essential to have a grasp of the potential costs involved. Here’s a breakdown of the financial aspects to consider:
Average Cost of Window Repair or Replacement
Minor repairs such as replacing weather stripping, re-caulking, or repainting window frames are generally affordable, often ranging from $100 to $300 per window. These repairs can mitigate issues like drafts and improve the overall appearance of the windows without a significant investment.
The cost of replacing windows can vary widely based on the window type, material, and installation fees. On average, homeowners might expect to spend anywhere from $300 to $1,000 per window for vinyl replacement windows, which are a cost-effective and popular choice. Wood or fiberglass windows can cost significantly more, potentially ranging from $600 to $2,000 per window.
Energy-Efficient Windows
If you opt for Energy Star-certified windows, the initial cost might be higher; however, these can offer long-term savings on energy bills and entice energy-conscious buyers. The additional investment might range from 10% to 15% more than standard windows but could be offset by energy savings over time.
Return on Investment (ROI)
While new windows can enhance your home’s value, they usually do not recoup 100% of the investment upon sale. The ROI for window replacement averages around 70%, which means for every $1,000 spent on new windows, you could expect to increase the home’s selling price by about $700. However, this figure can fluctuate based on your area’s housing market and buyer expectations.
Additional Factors
The Scale of Replacement: The cost will also depend on whether you’re replacing all windows or just a few. Quantity discounts may apply for larger jobs.
Custom Windows: Custom shapes and sizes will increase costs, so standard window sizes are more budget-friendly.
Installation Costs: Professional installation is crucial for window performance and typically accounts for a significant portion of the replacement costs. It’s worth getting multiple quotes to ensure competitive pricing.
Potential Rebates: Some energy-efficient upgrades qualify for rebates or tax credits, which can reduce the overall cost.
Ballpark Figures
For a modest-sized home, repairing windows could cost between $200 and $600 for basic fixes, while full replacement with standard, energy-efficient models could range from $3,000 to $10,000 or more, depending on the number and type of windows. It’s advisable to obtain at least three quotes from reputable contractors to get an accurate estimate for your specific situation.
Other Recommended Maintenance
Ensuring your home is presented at its best is key to achieving a successful and profitable sale. A well-maintained structure and facade are as critical as the condition of your windows. Address any exterior issues such as chipped paint, damaged siding, or missing roof tiles. A pristine exterior boosts curb appeal and indicates to potential buyers that the home is cared for inside and out.
Inside, tackle any basic repairs that could undermine the perceived value of your home. Fix leaky faucets, ensure all appliances are in working order, and oil any creaky hinges. These small adjustments contribute to the overall impression of a home that has been maintained diligently.
Servicing your home’s heating, ventilation, and air conditioning system is another crucial step. A functional and efficient HVAC system is a hidden complement to new windows, reinforcing the message of energy efficiency and comfort.
Good lighting is also paramount; it highlights your home’s best features, complements the new windows, and sets a welcoming ambiance. Replace any non-working bulbs and consider updating dated fixtures to modernize and brighten your space. Attending to these maintenance aspects shows a commitment to your home’s condition and can significantly sway a buyer’s perception, potentially making the difference between a house that lingers on the market and one that sells promptly at a desirable price.
When to Call a Professional
Deciding when to call a professional is an important step in preparing your home for sale. For window repairs or replacements, a professional should be consulted if you encounter issues beyond basic cosmetic fixes. This includes problems like foggy windows, which indicate a failed seal, windows that are difficult to open or close, or signs of rot or water damage on wooden window frames. These conditions often require specialized skills and tools to ensure the job is done correctly and safely.
For other home maintenance tasks, such as servicing your HVAC system, dealing with electrical work, or addressing significant plumbing issues, professional expertise is not just recommended, it’s essential. These systems can be complex and, if not handled properly, can lead to costly damage or pose safety risks.
Additionally, if you’re unsure about the structural integrity of your home or if you’ve discovered potential mold or pest infestations, it’s time to bring in experts. They can assess the situation accurately and provide solutions that will stand up to scrutiny during a home inspection.
In summary, for any task that goes beyond your knowledge, could affect your home’s safety, or might impact its value, enlist the services of a professional. This ensures that all work is up to code, completed efficiently, and presents your home in the best light for prospective buyers.
Conclusion
In a competitive real estate market, presenting your home at its finest can make all the difference. This being the case, the investment of replacing windows before selling the house is usually worth it. By carefully considering the condition of your windows and addressing other key maintenance issues, you set the stage for a successful and lucrative home sale.
Remember that while the charm is in the details, the confidence comes from the foundations. Don’t overlook the power of first impressions; ensure your windows and home maintenance speak of quality and care. When tasks exceed your expertise, calling in professionals is a smart investment in your home’s marketability. For guidance on the condition of your current windows or an inspection of any other home components, reach out to Inside and Out Property Inspections today.
https://stg-insideandout-insideoutstg.kinsta.cloud/wp-content/uploads/2024/01/windows-and-real-estate.jpeg10001500BJ Johnsonhttps://d39oyu4lp7snwz.cloudfront.net/wp-content/uploads/sites/54/2019/08/31171419/io-favicon-300x300.pngBJ Johnson2024-01-18 21:04:312024-01-18 21:04:32Is It Worth Replacing Windows Before Selling A House?
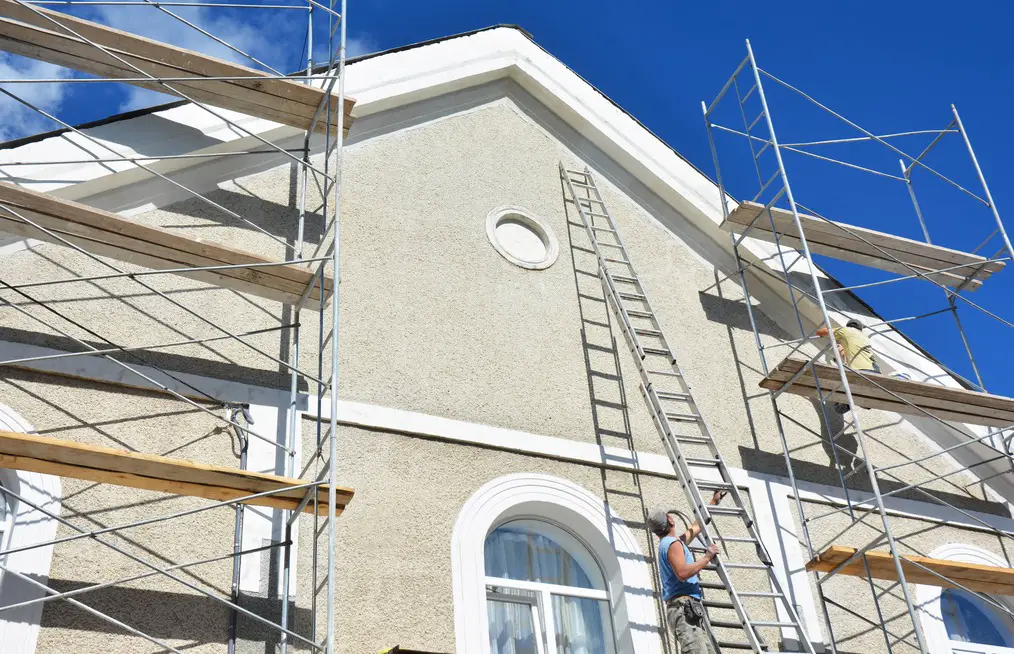
There are many types of materials that are used to build houses and one of them is stucco. Stucco is seen in many states in the south due to dry climates and less rainfall. One of those states is Florida. As with anything, sometimes it needs to be updated without replacing it. Can you paint stucco? Yes, and it can last about 10 years if you prep the area correctly and also use high-quality paint.
Let’s learn more about painting stucco.
What is Stucco?
Stucco is a durable, weather-resistant type of plaster used as a decorative coating for walls and ceilings, predominantly on building exteriors. It’s composed of cement, sand, and lime and applied in three coats over a lath base.
Can You Paint Stucco?
Yes, you certainly can paint stucco. Painted stucco can last up to 10 years or more depending on the quality of the paint used and the preparation done before painting.
Why Do Homeowners Want to Paint Stucco?
There are various reasons to paint stucco. Primarily, people opt for painting as it allows them to change the color of their exterior according to their preferences. Furthermore, it also provides an additional layer of protection from the weather.
Is It a Good Idea to Paint Stucco?
Painting stucco can be beneficial as it enhances its durability, improves the appearance of your exterior, and adds a protective layer against harsh weather conditions. However, the decision greatly depends on your personal choice, the climate, and the condition of your stucco.
What States Are Good for Painting Stucco?
Regions with dry climates such as Arizona, New Mexico, Nevada, and Texas are ideal for painting stucco due to less rainfall and humidity. Stucco is also used in Florida and many homeowners paint their homes.
Prep For Painting Stucco
When planning to paint stucco, make sure you thoroughly clean the surface before applying paint, use high-quality paint, and let each coat dry fully before applying the next one. Before painting, the stucco should be properly cleaned and any damaged parts should be repaired. Make sure the surface is dry before starting to paint.
Type of Paint to Use to Paint Stucco
Acrylic latex paint is typically the best choice for painting stucco, as it is flexible and can withstand the texture of stucco.
Steps to Paint Stucco
Clean the surface
Repair any cracks or damage
Apply a primer
Start painting with the chosen color
Allow the paint to dry before applying a second coat
Take a look at the video below for steps to paint stucco.
Other Recommended Maintenance
Now that you know about painting stucco, let’s take a look at a few other areas of recommended maintenance. One of those is pouring concrete in the rain. Sometimes it is hard to avoid our projects when it is raining, and you may have to pour the concrete in the rain. If this happens, you have to remove the excess water.
Another is what to put around the foundation of the house. You can put mulch, flower beds, plants, or grass around the foundation of the house. Make sure you also leave a few inches of space between the mulch and home if you go that route to keep out pests and termites.
Lastly. it is important to lock your garage door. This is because you need to make sure you have security in the home. You can have security by having padlocks, hasps, a smart garage door opener, or a garage door opening button.
When Do I Call a Professional?
If the stucco is severely damaged, it’s best to hire professionals to repair and paint it. Also, for larger projects with hard-to-reach areas, professional painters would be a safer choice. It’s important to keep the outside of your home looking nice and well-kept. You never know when you are going to move and need to keep it nice. Home maintenance is important to keep the home looking good.
Conclusion
Painting stucco is a great way to refresh the look of your exterior while also adding an extra layer of protection. However, proper preparation and the right type of paint are key to ensuring the longevity of the painted surface. If you aren’t sure how to paint the stucco you can reach out to Inside Out for recommendations for professionals. Also, while painting your stucco, this is a good time to have a home inspection. Reach out to Inside & Out Property Inspectors today.
https://stg-insideandout-insideoutstg.kinsta.cloud/wp-content/uploads/2024/01/painting_the_stucco_28.webp8621532BJ Johnsonhttps://d39oyu4lp7snwz.cloudfront.net/wp-content/uploads/sites/54/2019/08/31171419/io-favicon-300x300.pngBJ Johnson2024-01-03 02:20:152024-01-03 02:20:16Can You Paint Stucco?
Most homeowners consider their homes a work of art, an expression of their style, and indeed it is! The exterior tells a silent tale about the people residing within, thus choosing siding critical. Vinyl siding, over time, has gained momentum due to its aesthetics, durability, and cost-effectiveness. How long does vinyl siding last? As all good things come to an end, vinyl siding can last between 20-40 years with proper maintenance.
What is Vinyl Siding?
Simply put, vinyl siding is a popular home exterior cladding, made predominantly from PVC (polyvinic chloride). It’s known for its versatility, enabling homeowners to exhibit various architectural styles without worrying about maintenance or weather elements. But does its beauty stand the test of time?
The Lifespan of Vinyl Siding
On average, vinyl siding can last anywhere between 20 to 40 years when properly maintained. That’s almost as long as it takes for a sapling to grow into a mature tree. However, like every good thing in life, it doesn’t last forever.
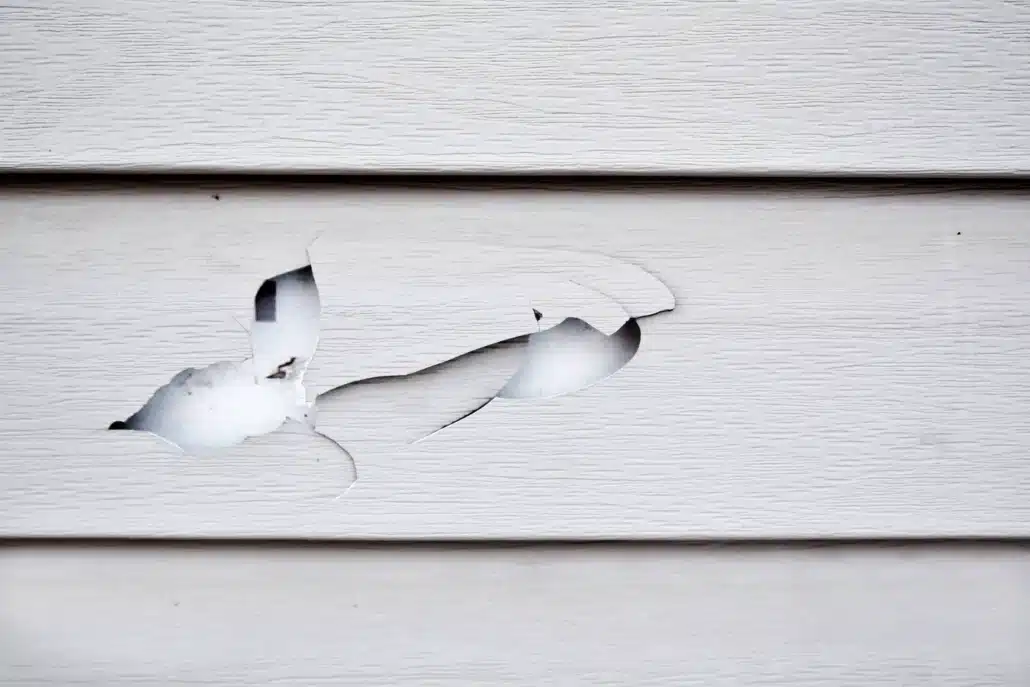
Signs Your Vinyl Siding Needs Replacing
When your faithful timepiece starts losing time, you know it needs attention. Similarly, certain signs indicate your vinyl siding may need replacing:
Fading or discoloration – you may be able to paint over it but it will depend on the
Visible cracks or holes – there could be bugs and rodents getting in
Warped panels – this type of damage needs replacing
Mold, mildew, or fungus growth– try power washing it on a low level or spraying with a hose to see if it can all be removed.
Rot – cracks, holes or gaps there may be water coming in.
These signs are like your siding’s cry for help — don’t ignore them!
Factors Affecting Lifespan of Vinyl Siding
Just as our lifestyle affects our health, several factors influence the lifespan of vinyl siding:
Exposure to harsh weather conditions
Quality of installation
Maintenance routine
While we cannot control the weather, the latter two are certainly within our reach.
Repairing Versus Replacing
These are your two trusty knights when your vinyl siding shows signs of damage. Repair is ideal for smaller issues like a single warped or cracked panel. Another one would be if the paint has faded. However, if more than a couple of panels look weary, it may be time to bring in the new! It is a good idea to check with a professional to be sure.
Maintenance of Vinyl Siding
“You reap what you sow,” and this stands true for vinyl siding too! Regular cleaning using mild detergent, inspection for wear and tear, and periodic repainting can elongate its lifespan. Washing it once a year is a good idea. Also, painting helps protect the siding from UV which may cause it to fade in color faster.
Other Types of Siding and Their Lifespan
While vinyl siding is a great option, the market is flooded with alternatives:
Wood Siding: 20-40 years, repaint every one to five years.
Fiber Cement Siding: 30-50 years. In some environments, it can last even longer! It is low maintenance and durable.
Brick Siding: 100+ years
Stone Siding: 75+ years
Each has its pros and cons, so choose wisely!
Other Recommended Maintenance
Now that you know how long vinyl siding lasts, let’s look at other areas of recommended maintenance. One of those is seamless gutters. These are a great addition to the outside of our home. They are seamless and are built right there at the home with custom measurements and installation.
Another is cutting vinyl siding. If you choose to add the siding to the home on your own, you can cut it. It can be done with specific tools and also following instructions.
Lastly, lead paint on the outside of homes. The good news is lead paint stopped being used in 1978 after it was found to be toxic. The bad news is homes and buildings that were built before then could still have it and need to be inspected.
When to Call a Professional?
At times, DIY might not cut it, and getting professional help becomes essential. If there’s extensive damage, difficulty in sourcing matching panels, or complexity in installation, it’s time to dial up a professional. Taking care of siding may be difficult for you so reaching out to a professional is a good idea. If you are unsure of the durability of the siding, call on a professional company to take a look at it for you.
Conclusion
Vinyl siding, undoubtedly, adds charm to your home. However, being aware of its life expectancy, understanding when it needs replacing, how to maintain it, and knowing other siding options enriches your homeowner experience. Remember, it’s not just about choosing the right siding; it’s also about making the siding right for you! If you have questions about the condition of your siding, or for a comprehensive home inspection, reach out to Inside & Out Property Inspectors today.
https://stg-insideandout-insideoutstg.kinsta.cloud/wp-content/uploads/2023/12/home_with_vinyl_siding_25.webp448672BJ Johnsonhttps://d39oyu4lp7snwz.cloudfront.net/wp-content/uploads/sites/54/2019/08/31171419/io-favicon-300x300.pngBJ Johnson2023-12-20 02:38:112023-12-20 02:38:12How Long Does Vinyl Siding Last?
Asphalt is a black, sticky substance that is commonly used in road construction and maintenance. It is a mixture of aggregates, binder, and filler material. The binder, typically bitumen, gives asphalt its adhesive properties. Considering that many people use asphalt for their driveway, you want to know when you can drive over it. How long does asphalt take to dry? It will depend on the humidity, temperature, and thickness of the asphalt but usually 24-48 hours.
Let’s take a look.
What is Asphalt?
Asphalt is mainly used for paving roads, parking lots, and driveways. It provides a smooth and durable surface that can withstand heavy traffic and harsh weather conditions. Asphalt is also used for patching potholes and repairing damaged road surfaces.
How Long Does Asphalt Take to Dry?
The drying time of asphalt depends on various factors such as temperature, humidity, and thickness of the layer. Generally, it takes around 24 to 48 hours for asphalt to dry completely. However, it may take longer in colder or more humid conditions.
When Can You Drive On Newly Poured Asphalt?
It is not recommended to drive on new asphalt immediately after it is poured. Freshly laid asphalt needs time to cool and harden. Driving on it too soon can cause damage and leave tire marks on the surface. It is best to wait at least 24 hours before driving on new asphalt.
Speeding Up the Asphalt Drying Process
To speed up the drying process of asphalt, you can:
Keep the area well-ventilated to allow moisture to evaporate.
Use fans or blowers to increase airflow.
Apply a thin coat of curing compound to promote faster drying.
Avoid parking heavy vehicles or placing heavy objects on the freshly laid asphalt.
How to Know the Asphalt is Cured?
You can determine if asphalt is cured by conducting a simple test. Press your thumb firmly into the surface of the asphalt. If it leaves an imprint or feels soft, it means the asphalt is not fully cured. Once the surface feels firm and no impression is left, the asphalt is considered cured.
Other Recommended Maintenance
Now that you know about asphalt drying, let’s take a look at a few other areas of recommended maintenance. One of those is exposed foundation above grade. The answer is that 6 inches should be exposed after grading. You want to make sure you have proper grading so water doesn’t collect around your foundation.
Another is drip irrigation. Homeowners often wonder how long to run drip irrigation. It depends on the soil and is usually one hour a week.
Lastly, brick pavers will get dirty over time. To clean them, you will need baking soda and detergent. As a last resort, you can use bleach but baking soda and detergent are better.
W
When Do I Call a Professional?
If you notice any signs of damage or deterioration on your asphalt surface, such as cracks, potholes, or unevenness, it is recommended to call a professional asphalt contractor. They have the expertise and equipment to assess and repair any issues with your asphalt.
Conclusion
In conclusion, asphalt is a versatile material used in road construction and maintenance. It takes around 24 to 48 hours for asphalt to dry completely, and it is important to wait before driving on new asphalt. By following proper drying techniques and knowing when asphalt is cured, you can ensure the longevity and durability of your asphalt surfaces. While you are taking care of your driveway, this is a great time to contact Inside and Out Property Inspectors in Jacksonville, FL, and surrounding areas to get your home inspection done today.
https://stg-insideandout-insideoutstg.kinsta.cloud/wp-content/uploads/2023/09/asphalt_driveway_25.jpeg600900BJ Johnsonhttps://d39oyu4lp7snwz.cloudfront.net/wp-content/uploads/sites/54/2019/08/31171419/io-favicon-300x300.pngBJ Johnson2023-09-30 23:49:172023-10-02 19:33:58How Long Does Asphalt Take to Dry?
Water temperature is often a topic in many homes. Some people like warm water for showers, while others prefer hot. Many people use hot water to wash dishes, while they drink cold water. There is a water temperature called tepid. Wondering what is tepid water? It is water that isn’t hot or cold and usually between 85°F and 105°F (29°C to 40°C).
Is Tepid Water the Same as Lukewarm Water?
Yes, tepid water and lukewarm water are essentially the same thing. Both terms refer to water that is moderately warm, with a temperature that is comfortable to touch and use. The word “tepid” is often used to indicate a neutral or mild warmth, while “lukewarm” is a more commonly used term in everyday conversations.
What Temperature is Tepid Water?
Tepid water is typically defined as water that is lukewarm or moderately warm. While there is no exact temperature range that defines tepid water universally, it is commonly considered to be between 85°F and 105°F (29°C to 40°C). This temperature range ensures the water is not too hot to cause burns or discomfort, yet not too cold to cause chilling sensations.
What is Tepid Water Used For?
Tepid water serves various purposes in our daily lives. Here are some common uses:
1. Personal Hygiene
Tepid water is often used for personal hygiene purposes, such as washing your face, hands, or body. It provides a soothing and refreshing sensation without the risk of scalding or freezing your skin. Tepid water can also be used in baths or showers, creating a relaxing experience.
2. First Aid
In first aid situations, tepid water is frequently recommended for cleaning wounds, as it helps to remove dirt and debris without causing additional pain or damage. It also aids in the prevention of infection, making it a safe and effective choice for wound care.
3. Baby Care
When caring for infants or young children, tepid water is particularly important. It is used for bathing babies, ensuring their delicate skin is not subjected to extreme temperatures. Tepid water is also utilized for preparing baby formula or bottle feeding, as it provides a gentle and comfortable experience for the baby.
4. Pet Care
Tepid water is commonly used for bathing pets. It allows for thorough cleaning without causing discomfort to the animal’s skin. Additionally, tepid water can be used for pet drinking bowls, ensuring that the water is at a pleasant temperature for your furry friends.
Wondering how to get tepid water? Take a look at the video below!
Other Recommended Maintenance
Now that you know about tepid water, let’s look at some other areas of recommended maintenance. One of those is the water heater. Knowing that the water heater controls the temperature of the water in the home, it is a good idea to maintain it. This can be done by flushing the hot water heater, adjusting the temperature and resetting it, turning the water heater back off and on, and checking the drain valve. There are also other ways.
Another is cleaning the thermocouple on the water heater. This is the small unit near the bottom of the gas water heater. It heats the necessary amount of water needed for your home. In order to clean it, you will have to shut down the power supply and then work carefully to remove the unit.
Lastly, after a water heater goes out, you will need to have a new one installed. This takes about 2-3 hours to be done. It is important to have someone who is knowledgeable about installing water heaters to install it.
When to Call a Professional
While using tepid water for everyday tasks is usually safe and convenient, there may be situations where professional assistance is required. Some instances where you may need to call Inside and Out Property Inspectors include:
Issues with your water heater, result in an inability to regulate water temperature.
Plumbing problems that cause irregularities in water temperature throughout your home.
Any concerns about water quality or safety that require expert evaluation.
If you experience any of these issues or have doubts about the proper functioning of your water system, it’s best to consult Inside and Out Property Inspectors to ensure your safety and peace of mind.
Conclusion
In conclusion, tepid water is a moderate and comfortable temperature range between hot and cold. It finds its use in various aspects of our daily lives, such as personal hygiene, first aid, baby care, and pet care. Understanding the uses and benefits of tepid water ensures a safer and more enjoyable experience for homeowners.
A deck is a great place to entertain friends and family and enjoy the outdoors. Trex composite decking is a nice deck material to have on the outside of your home. In order to keep it looking nice, there are various ways to maintain it, as maintenance is necessary. Wondering how to clean Trex decking? Sweeping, pressure washing, removing stains, and cleaning mold are a few ways to maintain your deck.
Let’s take a look.
What is Trex Decking?
Trex decking is a composite deck material and is an alternative to using wood. It doesn’t rot, warp, or splinter and is easier to clean. Additionally, it is made of 95% reclaimed wood so it is good for the environment. This type of decking is said to last about 27 years, which is longer than most people keep a home. There are different ways to keep it looking nice and lasting a long time.
1. Clean Dirt and Debris
A great way to clean Trex decking is regularly sweeping or using a leaf blower to help remove dirt, leaves, and other debris that may accumulate. This will prevent the build-up of dirt and grime, which can cause staining and discoloration over time.
2. Pressure Washing the Deck
Using a pressure washer can be an effective way to clean your composite deck. However, it is important to use caution when using this method, as excessive pressure or misdirected streams can damage the surface of your deck. Make sure to follow the manufacturer’s instructions and guidelines when using a pressure washer.
3. Removing Concrete, Cement, Mortar, or Stucco Dust
If your deck has come into contact with concrete, cement, mortar, or stucco dust, it is important to remove it promptly, as these substances can cause discoloration and staining. Use a mild detergent and warm water to clean the affected area, and rinse thoroughly.
4. Hard Water Staining
Hard water can leave unsightly stains on your composite deck. Clean your Trex decking to remove these stains, and use a cleaning product specifically designed for hard water stains. Follow the manufacturer’s instructions and guidelines for best results.
5. Removing Chalk Lines
Chalk lines can sometimes transfer onto your deck during construction or other projects. To remove chalk lines, use a mild detergent and warm water, and scrub gently with a soft brush or sponge. Rinse thoroughly after cleaning.
6. Ice and Snow Removal in Winter Months
During winter months, it is important to remove ice and snow from your composite deck to prevent slipping and potential damage. Use a plastic shovel or a broom with soft bristles to remove snow, and avoid using metal shovels or sharp objects that may scratch the surface of your deck.
7. Clean Up Oil, Grease, and Food As Soon As Possible
If your deck has come into contact with oil, grease, or food stains, it is important to clean them as soon as possible to prevent staining. Use a mild detergent and warm water to clean the affected area, and rinse thoroughly.
8. Mold and Mildew Removal
If you notice mold or mildew on your composite deck, it is important to remove it promptly to prevent further growth. Use a composite deck cleaner or a solution of 1 part bleach to 3 parts water to scrub the affected area. Rinse thoroughly after cleaning.
9. Maintaining Transcend and Select Railing
Transcend and Select railing systems require regular cleaning and maintenance to keep them looking their best. Use a mild detergent and warm water to clean the railing, and rinse thoroughly. Avoid using abrasive cleaners or scrub brushes that may scratch the surface.
10. Trex and Static Electricity Issues
In dry environments, composite decks may occasionally generate static electricity. To reduce static electricity, use an anti-static spray or apply a thin coat of liquid fabric softener diluted with water to the surface of your deck.
11. Lift and Remove Rubber Mats
Rubber mats can sometimes cause discoloration or staining on composite decks. To prevent this, periodically lift and remove rubber mats to allow air to circulate and prevent moisture buildup.
12. Construction and Remodeling Projects
During construction or remodeling projects, it is important to properly store materials and equipment to prevent damage to your composite deck. Avoid storing heavy objects or sharp tools directly on your deck’s surface, as this can cause scratching or other damage.
Check out the video below on cleaning Trex decking.
Other Recommended Maintenance
Now that you know about cleaning Trex decking, there are a few other things for recommended maintenance. One of those is cleaning black mold off the pool deck. To do this, you will need a scrub brush,
Another is your pool pump may be leaking. If this is happening, then you will want to have it checked for a broken seal, issues with the pump housing, improper fittings, a lid issue, or pump drain plugs to name a few.
Lastly, if you have a pool as well and notice it is leaking, that could be due to a few things. One way to know if there is a leak is if you are losing 1/4 inch of water a day. You can do a bucket test, and check the equipment pad, you may have bubbles in the return lines, or cracks in the pool.
When to Contact a Professional
If you are unsure about how to properly care for or clean your composite deck, or if you have stubborn stains or damage that you are unable to remove, it may be best to contact a professional deck cleaning and restoration company for assistance.
Coffee for many is a morning staple. It is the smell many want in the morning and the taste to start their day off right. When we run coffee in our machines, grounds are left over. What do we do with them? Some people think putting them down the sink makes it smell better. Can coffee grounds go down the sink? Unfortunately, no, as they don’t dissolve in water and can cause clogs in the drainage system.
Let’s take a look.
What Happens With the Coffee Grounds in The Sink?
As mentioned above, they don’t dissolve in water and can accumulate in pipes, leading to blockages. This can result in slow-draining sinks or even complete backups, requiring expensive repairs.
What Else Should Not Go In The Sink?
Apart from coffee grounds, there are several other items that you should never dispose of in the sink. These include:
Grease or cooking oil: These substances can solidify in pipes, causing major blockages.
Eggshells: The thin membrane lining inside eggshells can stick to pipes and create obstructions.
Rice, pasta, and bread: These starchy foods can absorb water and expand, leading to pipe blockages over time.
Fibrous vegetables, such as celery and potato peels: The long, stringy fibers can wrap around pipes and impede drainage.
Putting the wrong things down the sink can have serious consequences for your plumbing system. Clogs can develop, resulting in slow drainage, foul odors, and even sewage backups. In some cases, the pipes may burst or leak due to increased pressure caused by blockages. This can lead to extensive water damage and costly repairs.
Other Ideas For The Coffee Grounds
Instead of disposing of coffee grounds down the sink, there are several eco-friendly alternatives you can consider:
Composting: Coffee grounds make an excellent addition to compost piles or bins. They can enrich the soil with organic matter, improve drainage, and act as a natural fertilizer.
Gardening: Coffee grounds can be sprinkled around acid-loving plants like azaleas, rhododendrons, and blueberries. They provide essential nutrients and help maintain the desired pH level in the soil.
Cleaning: Coffee grounds can be used as an abrasive cleaner for pots, pans, and even as a natural scrub for exfoliating your skin.
Other Recommended Maintenance
Now that you know why you don’t put coffee grounds down the sink, let’s take a look at a few other areas of maintenance. One of those is drain cleaner in the garbage disposal. Some people say that drain cleaner is okay, but the problem is there are harsh chemicals used to make it. Thus, it can eat away at the pipes and cause major damage.
Lastly, garbage disposals don’t need a GFCI. They only need a dedicated circuit that is 15 or 20 amp and it should be a circuit that is separate from the dishwasher. This is so the dishwasher circuit is not on overload.
When to Call Inside and Out Property Inspectors?
If you have accidentally put the wrong things down the sink and are experiencing persistent plumbing issues, it is advisable to call Inside and Out Property Inspectors so we can recommend a master plumber. They have the expertise and proper tools to clear stubborn blockages safely and efficiently, preventing further damage to your plumbing system.
Conclusion
To maintain a healthy plumbing system and avoid costly repairs, it is crucial not to put coffee grounds and other inappropriate items down the sink. Also, by responsibly disposing of coffee grounds and using eco-friendly alternatives, you can protect your pipes and contribute to a more sustainable environment. If in doubt or facing severe plumbing problems, always consult a professional for assistance. Contact Inside and Out Property Inspectors in Jacksonville, FL, and surrounding areas to get your home inspection done today.
https://stg-insideandout-insideoutstg.kinsta.cloud/wp-content/uploads/2023/08/coffee_grounds_25.jpeg9361404BJ Johnsonhttps://d39oyu4lp7snwz.cloudfront.net/wp-content/uploads/sites/54/2019/08/31171419/io-favicon-300x300.pngBJ Johnson2023-08-15 01:02:012023-08-15 01:02:02Can Coffee Grounds Go Down The Sink?
There are different ways to irrigate plants. It depends on if you have a large garden or if you have just a few. In the end, you want to save money and not have a high water bill. Drip irrigation is one of the ways and it is better than a sprinkler. This is because it delivers water to the base of the plant and lowers the risk of overwatering and helps with root growth. Wondering how long to run drip irrigation for shrubs? It depends on the type of soil, but it is usually one hour a week.
Let’s take a look.
Why Drip Irrigation?
As mentioned above, drip irrigation is a better system than a sprinkler for shrubs as it zeroes in on an area, and has a low flow rate and slower rate of watering so the ground has time to absorb the water. Made of plastic flexible pipes, it is usually placed at the surface of the soil and covered with mulch or rock. It is usually used for plants that have roots such as fruits, vegetables, and shrubs.
Drip irrigation is used often for crops that are high-value because of the cost of installing a drip system and a timer is set to make sure it does not run too long. It is not used as much in lawns and fields or low-value vegetation. Those areas are better off with a traditional sprinkler system.
How Long to Run Drip Irrigation?
How long you run the drip irrigation system will depend on what you are watering. For example, trees may need 90 minutes twice a month. A flower bed may need twice a week for 60 minutes each time. The time for watering will vary because of the plants that are being watered and the emitters that are used. This is also because the emitters can put out 1/2 gallon up to 4 gallons per hour of water.
It also depends on the time of year as to when to run it and how long. One day a week in the months of April, May, September, and October. It is run twice a day from June to August if it is needed. However, that will also depend on where you live as here in Florida summer months are our rainy season and the drip irrigation probably does not need to run.
The length of time varies from 45 minutes to 1 hour each time to run this drip irrigation system to water shrubs. After you water, check the moisture of the soil in the root zone. Adjust the amount of time for the drip irrigation to run if needed. Then, check it twice a month to make sure that it functioning properly. If the area is newly landscaped, then it may need watering three days a week for about 30 minutes each. Checking the moisture of the soil each day is important.
Benefits of Drip Irrigation
There are a few benefits of drip irrigation to think about. Let’s take a look.
Healthy Plants – drip irrigation makes it possible for deep root growth. This is important in order for the plants to be healthy and allows them to be able to get through drought conditions when they happen.
Efficiency of Water – less water evaporates and less runoff due to water going to the plant’s roots.
Pest Control – this system helps get rid of certain pests and diseases. Wet leaves are more prone to fungal infections and standing water attracts mosquitoes. Since the irrigation system waters at the base of the plants, this issue is reduced.
How Much Does It Cost?
The average cost for a drip irrigation system is about $490. However, installation costs between $300 and $800.
Other Recommended Maintenance
Now that you know about irrigation systems, let’s look at some other areas of maintenance. One of those deals with your garden. Most homeowners do not like to pull weeds so many will find ways to deal with them. One of those ways is landscape fabric. Landscape fabric lets through a little bit of water, but most of it sits on top of the fabric. There are other alternatives such as newspaper, cardboard, and wood mulch.
Another area is knowing what temperature is too hot to water the grass. Here in Florida, it heats up quickly, so once the temperature rises above 95 degrees (no matter where you live), it is a good idea to wait. Many people will set their irrigation system to come on at night or in the early morning hours around sunrise to take advantage of the cooler temperatures.
Lastly, you may be wondering what to do with your garden. Using landscape rock is a good idea as it does not attract bugs. It is actually better than using some types of mulch that decompose and provide a food source for pests. You won’t run into this problem with landscape rock and it is aesthetically pleasing.
When Do I Call Inside and Out Property Inspectors?
Installing a drip irrigation can be difficult so it may be a good idea to call Inside and Out Property Inspectors. If you are finding that you aren’t sure how to install it or having issues with it, we are a phone call away. This type of system will save you money in the long run. While you are adding things like this to your yard, it may be a good time to also have a home inspection.
https://stg-insideandout-insideoutstg.kinsta.cloud/wp-content/uploads/2023/07/drip_irrigation_25.jpeg9281392BJ Johnsonhttps://d39oyu4lp7snwz.cloudfront.net/wp-content/uploads/sites/54/2019/08/31171419/io-favicon-300x300.pngBJ Johnson2023-07-26 17:15:032023-08-13 21:26:34How Long To Run Drip Irrigation For Shrubs
Owning a home comes with a lot of responsibilities and needs for maintenance. If you aren’t keeping up with the recommended maintenance or reading up on how to troubleshoot things when they break down, then you aren’t doing a great job as a homeowner. Owning a home is very much a second career for many homeowners. Things in a home can break down at a moment’s notice. Your systems in the home should be checked regularly. Things like air in your plumbing and electrical faults can occur. Knowing how to make the repairs is key. What causes air in water pipes? There are a variety of reasons from cracks in the pipes to replacing plumbing materials.
Let’s take a look below at what can cause air to get into your water pipes and how you can fix this.
What Does It Sound Like?
Having air trapped in your plumbing pipes can cause a variety of noises or sounds. The most common noise made by air in the water pipes is a hissing or popping sound. While your plumbing is still functioning, the system is letting you know it is having trouble or issues with accomplishing the job. Trapped air can sound like a gurgling noise, or even become a vibrating noise. In some cases, your pipes will rattle or vibrate inside of your walls, while you are using your water. Consequently, any tapping, hammering, or thumping sounds cause immediate concern and need immediate attention.
How Does The Air Get Into My Water Pipes?
Believe it or not, air can get into your water pipes in a variety of ways. Let’s take a look below at how air can get into your water pipes.
New Pipes or Changes – Anytime the homeowner is changing pipes or installing new ones, air can get into the water lines. Air bubbles and air locks can enter your plumbing system as the pipes are being replaced.
Neighboring Repairs – When your local municipality is updating or changing the plumbing system in your neighborhood, you will likely get some noisy pipes or sputtering water out of the faucets.
Water Heater – When corrosion due to a failing anode rod inside the water heater occurs, air can get into the water pipes. Additionally, you will notice a foul smell coming from your water as well as sediment and a cloudy component inside the water.
Shutting Off the Main Water – If your local municipality determines that the local water supply needs to be shut off for repair, air can get into your water pipes. While the municipality is conducting the repair work, the pipes are exposed to the outside air. All homes connected will experience some sort of air in-the-lines issue and will need to manage the problem.
Constant Heating – As water is heated, it forms air bubbles. When hot water is evaporated, it cannot exit the pipes. This keeps the air trapped in your plumbing system.
How Do I Get The Air Out?
Once you have noticed that air has entered your water pipes, you will need to take the necessary steps to get the air out. Let’s take a look below at how to get the air out of your water piping system.
Turn off the main water supply – Turn off the main water valve located in your basement, outside near the foundation of the home, under your kitchen sink, or near the water heating system. Doing this allows all remaining water to flow back into the plumbing system.
One-half turn your faucets – Working your way from the faucet closest to the main water valve, turn the faucets one-half turn to open them. This keeps high pressure down and allows water to flow freely. Additionally, run all appliances that require water. This includes a dishwasher, washing machine, and showers. Doing this opens every inlet that water accesses to push water through your plumbing. Consequently, it pushes the air through the plumbing system.
Wait for the faucets to stop running then flush all toilets – Allow the water to flow through all open faucets. Once the water flow stops running through the faucets you will flush all of the toilets. This eliminates all water from your plumbing system.
Turn the water back on – Leaving your faucets open or on, go and turn the main water supply valve back to the one position. Allow the water to flow for 10 to 15 minutes. If you notice no noises and a steady stream of water your process has worked. Additionally, use a cup of water and pour it into the washing machine and dishwasher so that they can run through a cycle. Steady flows of water equal pipes with no air. Also, as you shut off the faucets, you will work backward and start with the faucet farthest from the main water supply line.
Other Recommended Maintenance
Now that you are aware of how air has gotten into your water pipes you can being reviewing other possible plumbing issues in older homes. Once you purchase an older home, it is a great idea to read up on all of the possible issues that could arise. This allows you to save money towards any big repair needs down the road.
Next, there are other areas in your home where you might notice air bubbles in your water lines. The toilet is often a place that has an issue with too much air, based on the water pressure and the need to swap out old equipment. Be sure to understand why your toilet bubbles when the shower is running. This could be a result of air in your water lines.
Lastly, if you notice a problem with your bathroom smelling like sewage, you should immediately investigate this. Checking all drains and other possible causes during a sewer scope inspection is key. As you work to get the air out of your water pipes, you might also get rid of any clogs or bacteria build-up that has caused this foul smell.
When Do I Call A Professional?
Once you discover a plumbing concern, you will want to contact a professional. Troubleshooting every possible scenario as to why air is in your water pipes is going to be difficult. In many cases, this could mean needing to send a camera into the plumbing to further investigate the issue. Getting a sewer scope while you are getting a home inspection is a great idea. Your local home inspection team can conduct a sewer scope inspection. Also, they can recommend a reputable master plumber.
Conclusion
Discovering why you have air in your water pipes is a necessary thing to save money on your utility bill. If air is in your water lines, chances are that you leak. Also, it is possible that a new plumbing item was just replaced. It is a great idea to call on a master plumber to assist with getting air out of your water lines. Additionally, call on your local home inspection team. They can inspect your entire plumbing system and recommend a reputable master plumber to help with your plumbing needs. Contact Inside and Out Property Inspectors in Jacksonville, FL, and surrounding areas to get your sewer scope inspection done today.
https://stg-insideandout-insideoutstg.kinsta.cloud/wp-content/uploads/2023/07/water_droplets_25.jpeg10001500BJ Johnsonhttps://d39oyu4lp7snwz.cloudfront.net/wp-content/uploads/sites/54/2019/08/31171419/io-favicon-300x300.pngBJ Johnson2023-07-13 00:55:112023-07-13 00:55:11What Causes Air In Water Pipes?
I attended the inspection. I stayed out of their way and tried not to disrupt their flow, and when there was a concern or important thing to mention they would inform me of it and provide information as to why it was worth mentioning. Will and Logan were thorough and professional.
There’s absolutely no one I trust more when it comes to inspections than BJ and his crew at Inside and Out Property Inspection. I’ve been working with them for over 2.5 years and they’ve consistently delivered top-notch service. In fact, I even hired them to inspect my own mother’s house, so that should tell you everything you need to know!They’re not just checking boxes or going through the motions,they really know what they’re doing and it shows. I refer every single one of my clients to them because I know the job will be done right. Yes, they might be a little more expensive than some others out there, but trust me, you get what you pay for. And when it comes to your biggest investment, that peace of mind is worth every penny.Highly recommend without hesitation!
We were pleased with the efficiency, professionalism, and courtesy of the staff on sight. Will was extremely knowledgeable as he reviewed the findings with us and thoroughly answered all our questions. Thank you BJ and Will.
Will Vogel did our inspection for me and my wife on June 7th 2025 he was kind, sweet and overall absolutely wonderful. He did an amazing job with our inspection. Will definitely be going back to this company again.
Outstanding New Home Inspection!I had an excellent experience with Inside & Out Property Inspectors for my newly built home! From the moment I scheduled the inspection, their communication was clear and professional. On the day of the inspection, they arrived on time, were extremely thorough, and took the time to explain everything in a way that was easy to understand—even for a first-time homeowner.They carefully inspected every part of the home, inside and out, and provided a detailed, well-organized report that gave me peace of mind moving forward. Their attention to detail helped catch a few things I wouldn’t have noticed on my own, which I truly appreciated.If you’re looking for a trustworthy, knowledgeable, and detail-oriented inspector for your home, I highly recommend Inside & Out Property Inspectors. Their service is top-tier, and they truly go above and beyond!
My fiancé and I are in the process of purchasing our first fixer upper. BJ and Will came out and were extremely detail oriented with the inspection. They also helped us understand and learn about certain aspects of the house, what to look out for, and what they could cost. They were also very friendly throughout the process. Could not recommend In & Out more!! Thank you BJ and Will!
Great job by this company. They showed up on time and they were very thorough and helpful. They did not rush through the job and they did a great job explaining everything. I highly recommend them for their services. Very reasonable on price too.
Wonderful and professional job.Also, great in answering my questions and giving me helpful advice. Their sincere kindness and complete job was appreciated.
I was out of state, so my realtor handled the appointment. He stated that the inspectors were prompt, neat & professional.I received the report in 24 hours. It was complete and well organized. I appreciated the recommended vendors for any issues that were pointed out from the inspection. Thank You
This company was recommended to me by a trusted real estate agent. I found them to be extremely organized and prompt from the first call to the office to the report. Alex was very thorough and provided an excellent report. I would highly recommend.
BJ was great! Very professional and super helpful. He went through everything carefully and even for me it was all very easy to understand what all needed to be done next and why so im thankful for that! Highly recommend for any of your inspection needs.
Absolutely worth every penny. I thought the home looked great at first glance, but Will’s thorough 21-page report uncovered things I never would have noticed. I highly recommend Inside & Out Property Inspectors for your final home inspection — their attention to detail is unmatched.
Alex and Logan did a phenomenal job inspecting the house. Not only were they extremely thorough but they also explained everything they found in detail. They showed professionalism and were friendly. My Husband and I would recommend using them in the future.
BJ and the team at inside out took great care of us with our home inspection. Moving across the state is hard enough, buying a home built when I was in high school was an even scarier process. BJ and his team provided all of the information, assurance, resources, and help we could ask for not only in understanding the various inspection reports, but in understanding the thought and process behind each item listed. We highly recommend inside and out property inspections.
Had my home inspection done and they were very thorough and when finished went over every thing with me and took the extra time to answer questions and show me exactly where the problems were. Very nice and respectful as well. I highly recommend.
Inside/Out Inspectors were on time and very thorough. With a team of 3 inspectors working simultaneously & diligently, they completed the job quickly. And then each inspector took the time to walk my customer around and through the home explaining their findings along the way. I would definitely recommend them.
I have wonderful experience with this company. Everything seem to be seamless. The inspectors walked me through the entire process, and they found things that I wouldn’t have never been able to find on my own. I’m so grateful I would highly recommend inside and out!
I had a great experience working with BJ with Inside & Out Inspectators for a property inspection. BJ was thorough, professional, and took the time to explain findings in a clear and helpful way. I appreciated the detailed report, which was well-organized and easy to understand, complete with photos and practical recommendations. I highly recommend BJ to anyone in need of a reliable and knowledgeable home inspector.